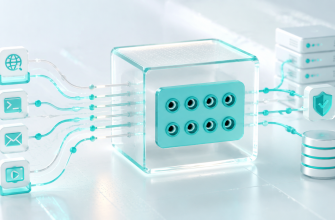
SSH keys are one of the safest and most practical ways to access a remote server. Instead of sending a reusable password, your computer proves that it possesses a private cryptographic key while the server checks the matching public key.
An SSH key pair contains two related files: a private key that remains on your computer and a public key that can be installed on servers. During authentication, the private key is used to create cryptographic proof. The server verifies that proof with the public key.
The private key is not uploaded to the server and is not transmitted during login.
- What SSH keys are and why they are used
- How public-key authentication works
- The difference between user keys and host keys
- Where OpenSSH stores trusted keys
- How to generate and inspect a key pair safely
- How to avoid lockouts and private-key exposure
- What Is an SSH Key?
- Private key
- Public key
- Why SSH Keys Are Safer Than Reusable Passwords
- How Public-Key Authentication Works
- The client contacts the server
- The server proves its identity
- The client offers a public-key identity
- The client proves possession
- The server verifies the proof
- User Keys and Host Keys Are Different
- What a host-key warning means
- Where OpenSSH Stores the Keys
- Passphrases Protect Private Keys at Rest
- Generate a Key Pair Safely
- Authorize the Public Key on a Server
- Mini Lab: Create and Inspect a Practice Key
- 1. Create a separate lab directory
- 2. Generate the practice key
- 3. List the generated files
- 4. Display the fingerprint
- 5. Identify the files
- Common SSH-Key Mistakes
- Copying the private key to the server
- Sharing one private key across a team
- Ignoring file permissions
- Accepting every host-key prompt
- Disabling passwords before testing
- Never removing obsolete keys
- A Practical SSH-Key Lifecycle
- Knowledge Check
What Is an SSH Key?
SSH, or Secure Shell, is a protocol for creating an encrypted connection to another computer. Administrators commonly use it to open a remote shell, transfer files, create tunnels, and manage servers.
An SSH key is a cryptographic credential used to authenticate a user or a machine. A normal user key pair has two parts:
Private key
Stored on the client device and kept secret. It is used to prove possession of the credential.
Typical file: ~/.ssh/id_ed25519
Public key
Installed on each server or account that should accept the credential. It does not reveal the private key.
Typical file: ~/.ssh/id_ed25519.pub
The two files are mathematically related, but the private key cannot feasibly be reconstructed from the public key. That asymmetry is what makes the arrangement useful: you can distribute the public half while protecting the private half.
Do not send the private-key file to a hosting provider, teammate, control panel, or server. A person who obtains an unprotected private key may be able to authenticate anywhere its public counterpart is authorized.
Why SSH Keys Are Safer Than Reusable Passwords
Password authentication requires the server to decide whether a supplied password is correct. A weak, reused, or exposed password can be guessed or stolen. Internet-facing SSH services also attract automated login attempts.
With public-key authentication, the server stores a public key rather than a reusable secret. The client proves possession of the corresponding private key without transferring that private key to the server.
| Property | Password login | SSH key login |
|---|---|---|
| Credential protected by the client | A password | A private key, usually protected by a passphrase |
| Server-side authorization data | Password verifier or external identity record | Public key or trusted certificate authority |
| Reusable secret sent to the server | The password is supplied through the encrypted SSH connection | The private key is never sent |
| Automated guessing risk | Depends heavily on password strength and controls | Not susceptible to conventional password guessing |
| Removing access | Change or disable the account credential | Remove the relevant public key or revoke its certificate |
SSH keys do not make an account invulnerable. A stolen private key, an unprotected workstation, insecure server configuration, or careless authorization can still result in unauthorized access.
How Public-Key Authentication Works
The exact SSH protocol includes several negotiation and verification steps. For a beginner, the user-authentication flow can be understood as five stages.
-
1
The client contacts the server
Your SSH client opens an encrypted connection to the SSH service running on the remote server.
-
2
The server proves its identity
The server presents a host key. Your client checks it against a trusted fingerprint or a previously recorded entry in
known_hosts. -
3
The client offers a public-key identity
The client identifies a public key that may correspond to the requested server account.
-
4
The client proves possession
The client uses the private key to produce a signature over protocol data. If the private key is encrypted, the client or an SSH agent must first unlock it with its passphrase.
-
5
The server verifies the proof
The server checks the signature with the authorized public key. If the proof and account policy are valid, authentication succeeds.
SSH encryption and SSH authentication answer different questions. Encryption protects the connection. Authentication establishes which client and server are participating in it. A connection can be encrypted while still reaching an impersonating server if its host key is not verified.
User Keys and Host Keys Are Different
SSH uses keys on both sides of the connection, but they serve different identities.
| Key | What it identifies | Who verifies it | Common trust file |
|---|---|---|---|
| User key | A user or client credential | The SSH server | ~/.ssh/authorized_keys on the server |
| Host key | The SSH server | The SSH client | ~/.ssh/known_hosts on the client |
The distinction matters when SSH displays a host-key warning. That warning is about the identity of the server, not the user key used to log in.
What a host-key warning means
On a first connection, the client may show the server’s host-key fingerprint and ask whether you trust it. Verify that fingerprint through an independent source, such as the provider console or a trusted administrator.
If a previously trusted host key changes, the server may have been rebuilt or its keys may have been rotated. It could also indicate that the connection is being intercepted. Investigate the change instead of automatically deleting the warning.
Where OpenSSH Stores the Keys
~/.ssh/id_ed25519
Private key on the client. Keep it secret.
~/.ssh/id_ed25519.pub
Public key corresponding to the private key.
~/.ssh/authorized_keys
Public keys allowed to access a server account.
~/.ssh/known_hosts
Host identities previously trusted by the client.
~/.ssh/config
Optional client settings, aliases, usernames, ports, and key paths.
The tilde character represents the current user’s home directory. These paths are conventions and defaults, not universal guarantees. Administrators can change server settings, and clients can use custom filenames.
Passphrases Protect Private Keys at Rest
A key passphrase encrypts the private-key file stored on your device. If someone copies that file, they generally also need the passphrase before they can use it.
The passphrase is local protection. It is not the server account password, and it is not sent to the server. If you forget it, it normally cannot be recovered; create a replacement key and install its public half instead.
An SSH agent can hold unlocked key material for a session, reducing repeated passphrase prompts. This improves convenience, but access to an unlocked desktop session or agent can still carry risk.
A private key without a passphrase is not automatically insecure. Automated services sometimes require non-interactive credentials. However, removing the passphrase eliminates an important layer of protection if the file is copied. Compensating controls should include restricted file permissions, limited accounts, narrowly scoped authorization, monitoring, and reliable revocation.
Generate a Key Pair Safely
OpenSSH provides ssh-keygen for generating and managing authentication keys. Ed25519 is a practical default for modern OpenSSH environments. Compatibility requirements may lead an administrator to choose another supported type.
The following command creates an Ed25519 key using the default filename. The comment helps identify the key later and is not an access-control rule.
ssh-keygen -t ed25519 -C "name@device"The program asks where to save the key and whether to protect it with a passphrase. Before accepting a filename, check whether it already exists. Overwriting a private key can break access to systems that depend on it.
After generation, inspect the public key’s fingerprint:
ssh-keygen -lf ~/.ssh/id_ed25519.pubThe fingerprint is a compact identifier for comparing keys. It is safer to compare a fingerprint than to compare a long public-key line visually.
Authorize the Public Key on a Server
To permit login, the public key must be associated with the intended server account. In a standard OpenSSH configuration, it is added as one complete line in that account’s ~/.ssh/authorized_keys file.
Some Unix-like systems provide ssh-copy-id, which installs a local public key through an existing login method:
ssh-copy-id -i ~/.ssh/id_ed25519.pub username@server-addressIf that utility is unavailable, use the hosting control panel, provisioning system, configuration-management tool, or an administrator-approved manual process. Copy only the contents of the .pub file.
Then test access explicitly with the selected key:
ssh -i ~/.ssh/id_ed25519 username@server-addressDo not disable password authentication or close your existing administrative session until key login succeeds in a second terminal. Confirm that you also have a tested recovery path, such as a provider console or another administrator account.
Mini Lab: Create and Inspect a Practice Key
Goal: Generate a practice key locally, identify its two files, and inspect its fingerprint. No server or paid service is required.
1. Create a separate lab directory
This keeps the practice files away from your normal SSH identities.
mkdir -p ~/servers-academy-ssh-lab2. Generate the practice key
Before running the command, confirm that the destination does not already contain a key with this name. Enter a temporary practice passphrase when prompted.
ssh-keygen -t ed25519 \
  -f ~/servers-academy-ssh-lab/id_ed25519 \
  -C "servers-academy-lab"
3. List the generated files
You should see one private-key file and one public-key file ending in .pub.
ls -l ~/servers-academy-ssh-lab4. Display the fingerprint
This reads the public key and prints its identifying fingerprint.
ssh-keygen -lf ~/servers-academy-ssh-lab/id_ed25519.pub5. Identify the files
id_ed25519is the private key. Do not share it.id_ed25519.pubis the public key. This is the file that may be installed on a server.
Success check: You can explain why the two files have different handling rules and can locate the SHA-256 fingerprint printed by ssh-keygen.
Common SSH-Key Mistakes
Copying the private key to the server
The server needs the public key. Uploading the private key expands the number of places where the secret can be stolen.
Sharing one private key across a team
Shared keys obscure accountability and make offboarding difficult. Give each person and device a distinct credential.
Ignoring file permissions
OpenSSH may reject keys when sensitive directories or authorization files are writable by other users. Loose permissions also expose credentials unnecessarily.
Accepting every host-key prompt
Automatic acceptance defeats an important server-identity check and can hide misrouting or interception.
Disabling passwords before testing
A wrong username, key path, permission, or server setting can lock you out. Always test in a separate session first.
Never removing obsolete keys
Old contractor, employee, laptop, and automation keys remain valid until their authorization is removed or revoked.
A Practical SSH-Key Lifecycle
- Generate: Create the key on the device that will use it.
- Protect: Use a suitable passphrase and restrictive local permissions.
- Label: Add a meaningful comment that identifies the owner and device.
- Authorize: Install only the public key on the required accounts.
- Test: Verify login and recovery before changing authentication policy.
- Monitor: Review authentication logs and investigate unexpected access.
- Rotate: Replace keys when devices, responsibilities, or risk conditions change.
- Revoke: Remove authorization immediately if a private key may be compromised.
SSH keys should represent identifiable access paths, not permanent anonymous master credentials. A useful key comment, one key per device, and a current authorization inventory make incident response much faster.
Knowledge Check
- Which part of an SSH key pair should be installed on the server?
- Does the SSH client transmit the private key during authentication?
- What is the purpose of a private-key passphrase?
- How does
authorized_keysdiffer fromknown_hosts? - Why should password login remain available until key login has been tested?
- What should you do if a private key may have been copied by an unauthorized person?
🎓 Check Your Answers
1. Install the public key. The private key remains on the client device.
2. No. The client uses it locally to produce cryptographic proof.
3. It encrypts and protects the stored private-key file against immediate use if the file is copied.
4. authorized_keys lists user keys accepted by a server account. known_hosts records server identities trusted by the client.
5. A configuration, username, permission, or key-path error could otherwise lock you out.
6. Remove or revoke its authorization, create a new key pair, install the replacement public key, and investigate possible use of the compromised credential.
SSH key authentication works because the client can prove possession of a private key without sending it to the server. Keep the private key local, protect it with appropriate controls, verify server host keys, give every user and device an identifiable credential, and remove authorization when that credential is no longer trusted.