
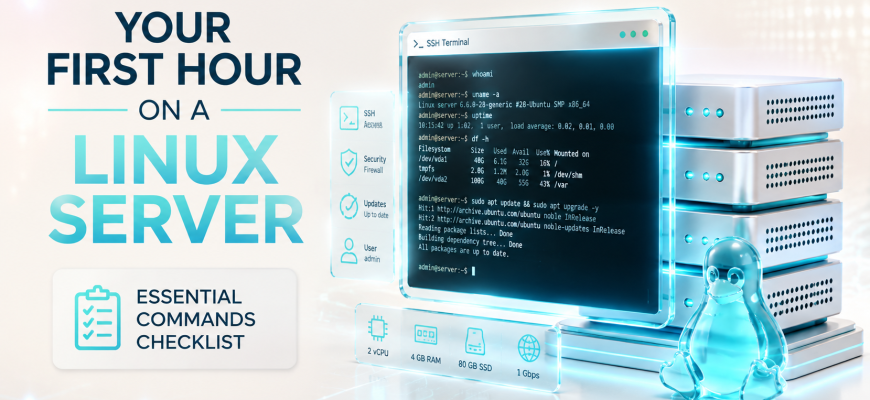
Getting access to a new Linux server is only the beginning. Before you install a website, Docker, a database, a VPN, or a production application, you should first understand the system you received and establish a safe administrative baseline.
This first-hour checklist walks you through that process on a new Ubuntu or Debian-based VPS: connecting with SSH, checking resources, installing updates, creating an administrator account, configuring key-based access, reviewing network exposure, and verifying that the server is ready for its next role.
- How to connect to a new Linux server with SSH.
- How to identify the operating system and inspect server resources.
- How to update packages safely.
- How to create a separate administrator account with sudo.
- How to prepare SSH key authentication without locking yourself out.
- How to configure a basic firewall and inspect listening ports.
- How to perform a final health check before deploying applications.
Keep your existing root SSH session open while changing SSH accounts, authentication, or firewall rules. Test every access change from a second terminal session before disconnecting the original one. This simple habit can prevent you from locking yourself out of the server.
- 🧭 Your First-Hour Roadmap
- 🔐 1. Connect to the Server with SSH
- Check Your Current Identity
- 🔎 2. Identify the Operating System
- 📊 3. Inspect CPU, Memory and Storage
- 🌐 4. Inspect the Network
- ⬆️ 5. Update Installed Packages
- 🏷️ 6. Set a Useful Hostname
- 🕒 7. Check the Server Time
- 👤 8. Create a Separate Administrator
- 🔑 9. Set Up SSH Key Authentication
- 🛡️ 10. Review SSH Configuration Carefully
- 🔥 11. Configure a Basic Firewall
- 👀 12. See What Is Actually Listening
- ⚙️ 13. Review Running Services
- 🔄 14. Configure Automatic Security Updates
- 💽 15. Check Swap
- 📜 16. Learn Where to Look When Something Fails
- 🧰 17. Add a Small Administration Toolkit
- ♻️ 18. Reboot and Verify
- ✅ Final Linux Server Checklist
- 🚫 Common First-Server Mistakes
- 🧪 Knowledge Check
🧭 Your First-Hour Roadmap
The goal is not to install as much software as possible. Your first hour should establish three things: access, awareness, and a safe baseline.
🔐 1. Connect to the Server with SSH
Your provider normally gives you an IP address and an initial authentication method, such as a root password or SSH key.
From a terminal, connect with:
ssh root@SERVER_IPFor example:
ssh root@203.0.113.10The first connection may ask you to confirm the server’s SSH host key. When your provider exposes the expected fingerprint through a trusted channel, compare it before accepting the key.
Check Your Current Identity
whoami
If you connected with the initial administrator account, the output may be root. Root has unrestricted administrative privileges, so commands executed as root deserve extra care.
🔎 2. Identify the Operating System
Before following any Linux tutorial, identify the distribution and release actually installed on your server.
cat /etc/os-releaseCheck the running kernel with:
uname -rDistribution and release information matters because package managers, package names, repositories, configuration paths, service names, and security tooling can differ across Linux families.
📊 3. Inspect CPU, Memory and Storage
Before deploying anything, establish a baseline and make sure the virtual machine roughly matches the resources you expected.
lscpunproc
free -h
df -h
lsblk
For disk space, pay particular attention to the filesystem mounted at /. A server can have a large disk attached while its root filesystem is much smaller, so checking only the advertised storage capacity is not enough.
🌐 4. Inspect the Network
For a concise view of network interfaces:
ip -br addrThen inspect routing:
ip routeYou do not need to understand every networking detail yet. At this stage, identify which interfaces exist, which addresses are assigned, and where the default route points.
⬆️ 5. Update Installed Packages
A newly provisioned VPS may have been created from an image that predates current package updates. Updating the system reduces the gap between the image and the currently available packages.
On Ubuntu or Debian:
apt update
apt upgrade
Check whether the system indicates that a reboot is required:
test -f /var/run/reboot-required && echo "Reboot required"Do not reboot simply because updates are finished. If you are still changing remote-access settings, finish and test those changes first so that you know how you will reconnect.
🏷️ 6. Set a Useful Hostname
Inspect the current hostname:
hostnamectlSet a descriptive hostname:
hostnamectl set-hostname web01
Names such as web01, db01, or vpn01 become useful once you administer more than one machine. Use a naming scheme that remains understandable as your infrastructure grows.
🕒 7. Check the Server Time
Inspect the current configuration:
timedatectlFor example, to use UTC:
timedatectl set-timezone UTCUTC is commonly used on servers because it gives logs and monitoring systems a consistent reference across locations. What matters most is that your time configuration is deliberate and understood.
👤 8. Create a Separate Administrator
Instead of performing routine administration from a permanent root shell, create a named account and grant administrative privileges through sudo.
adduser admin
usermod -aG sudo admin
Verify group membership:
groups adminThen test administrative access:
su - admin
sudo whoami
If sudo is configured correctly, sudo whoami should return root.
🔑 9. Set Up SSH Key Authentication
SSH keys let the server authenticate possession of a private key rather than relying only on a reusable login password.
On your local computer, create an Ed25519 key if you do not already have an appropriate SSH key:
ssh-keygen -t ed25519On systems with ssh-copy-id, you can copy the public key with:
ssh-copy-id admin@SERVER_IPThen open a new terminal and test:
ssh admin@SERVER_IP
sudo whoamiDo not disable another working authentication method until the new account and key have been tested in a separate session. A configuration that looks correct on screen is not the same as a login that has actually succeeded.
🛡️ 10. Review SSH Configuration Carefully
OpenSSH server settings are commonly stored in /etc/ssh/sshd_config, although modern installations may also load additional configuration files.
Before editing, create a backup:
sudo cp /etc/ssh/sshd_config /etc/ssh/sshd_config.backupAfter making deliberate changes, validate the configuration before reloading the service:
sudo sshd -tIf validation reports no errors, reload SSH:
sudo systemctl reload sshIf you choose to disable direct root login or password authentication, do so only after confirming that your alternative administrative login works.
🔥 11. Configure a Basic Firewall
A firewall helps limit which network services can be reached. On Ubuntu, UFW provides a convenient interface for managing host firewall rules.
Allow SSH before enabling the firewall:
sudo ufw allow OpenSSH
sudo ufw enable
sudo ufw status verbose
If this server will later host a website, HTTP and HTTPS commonly use:
sudo ufw allow 80/tcp
sudo ufw allow 443/tcpDo not ask, “Which ports should a server have open?” Ask, “Which services does this specific server need to expose?” Everything else can remain unreachable unless there is a reason to allow it.
👀 12. See What Is Actually Listening
Firewall rules tell you what traffic is allowed. You should also know which processes are listening for connections.
sudo ss -tulpnA fresh server may have only a small number of listening services. Later, a web server may listen on ports 80 and 443, a database may listen locally or on a private network, and additional applications may introduce their own sockets.
An unfamiliar listening port is not automatically malicious. It is a prompt to identify the process and understand why it is there.
⚙️ 13. Review Running Services
List active systemd services:
systemctl --type=service --state=runningInspect an individual service:
systemctl status ssh
Learning systemctl early is useful because web servers, databases, Docker, SSH, monitoring agents, and many other Linux components are commonly managed as services.
🔄 14. Configure Automatic Security Updates
Ubuntu and Debian systems can use unattended-upgrades to automate selected package updates.
sudo apt install unattended-upgrades
sudo dpkg-reconfigure unattended-upgrades
Automation can reduce the time that known security fixes remain unapplied, but it does not replace backups, monitoring, maintenance planning, application updates, or a recovery strategy.
💽 15. Check Swap
swapon --show
free -h
Some VPS images have swap configured; others do not. That is not automatically a problem. The appropriate configuration depends on available memory, workload behavior, storage characteristics, and operational requirements.
Most importantly, swap is not a replacement for sufficient RAM.
📜 16. Learn Where to Look When Something Fails
You do not need to memorize Linux logging on day one. You should, however, become comfortable asking the system what happened.
A warning is not automatically a failure. The skill you are building is the ability to observe the server before guessing what is wrong.
🧰 17. Add a Small Administration Toolkit
Minimal server images may omit utilities you expect to find. Install tools because you need them rather than filling the server with packages “just in case.”
A useful starter set might be:
sudo apt install curl wget git nano htop unzip dnsutilsHTTP and network testing
Version-controlled projects
Interactive process view
DNS troubleshooting tools
♻️ 18. Reboot and Verify
If a reboot is required after updates, and you have already verified remote access, reboot:
sudo rebootReconnect with your administrative account and perform a final check:
uptime
free -h
df -h
sudo ufw status
sudo ss -tulpn
systemctl --failed
Pay particular attention to systemctl --failed. Investigate unexpected failed units before treating the server as ready.
✅ Final Linux Server Checklist
- SSH access works.
- A separate administrator account exists.
- sudo access has been tested.
- SSH key authentication works.
- Access changes were tested from a second session.
- Linux distribution and release identified.
- CPU, RAM, storage, and networking inspected.
- Available package updates installed.
- Hostname and timezone reviewed.
- Firewall configuration reviewed.
- SSH remains reachable.
- Listening ports are understood.
- Running services have been reviewed.
- Automatic security updates have been considered or configured.
- Logs have been inspected.
- Swap configuration is understood.
- The server has been rebooted if required.
- No unexplained failed services remain.
🚫 Common First-Server Mistakes
Always verify a new login path before disconnecting the session that already works.
Remote firewall changes should be planned around preserving administrative access.
Every additional service adds configuration, resource use, maintenance, and potentially another exposed component.
Administrative commands can change access, networking, files, packages, and security. Understand the purpose of a command before running it as root.
A secure baseline is only the beginning. Servers require ongoing updates, monitoring, backups, and application maintenance.
🧪 Knowledge Check
- Why should you keep your original SSH session open while changing remote access?
- Which file tells you which Linux distribution is installed?
- Which commands can you use to inspect RAM and disk usage?
- Why create a separate administrative user?
- What should you test before disabling an existing SSH authentication method?
- Why should SSH be allowed before enabling a remote firewall?
- Which command shows listening TCP and UDP sockets?
- What does
systemctl --failedhelp you find? - Why is swap not a substitute for sufficient RAM?
🎓 Check Your Answers
- So you retain a working connection if the new configuration fails.
/etc/os-release.free -handdf -h.- To perform routine administration through a named account and elevate privileges with sudo when required.
- A successful login using the new account and authentication method, including working sudo access where required.
- Otherwise you could block the connection you use to administer the remote machine.
ss -tulpn.- Unexpected failed systemd units.
- Swap can help with memory pressure, but it is much slower than RAM and does not provide equivalent capacity or performance.
Your first hour on a Linux server is about establishing control before adding complexity. Know what system you received, preserve reliable administrative access, understand what is exposed to the network, update the base system, and verify its health before deploying applications.